Arancini di Riso con Ragu: A Step-by-Step Guide

Arancini di Riso con Ragu
Equipment
- Equipment Needed
- Large pot
- Skillet
- Mixing bowl
- Baking sheet
- Large spoon or spatula
- Measuring cups and spoons
- Shallow dish for breadcrumbs
- Deep fryer or heavy-bottomed pot for frying
- Slotted spoon
Ingredients
- Ingredients
- For the Risotto:
- 1 cup Arborio rice
- 4 cups chicken or vegetable broth warm
- 1 small onion finely chopped
- 2 cloves garlic minced
- 1/2 cup grated Parmesan cheese
- 1 egg beaten
- Salt and pepper to taste
- 2 tablespoons olive oil
- For the Ragu Filling:
- 1 tablespoon olive oil
- 1 small onion finely chopped
- 1 clove garlic minced
- 1/2 pound ground beef or Italian sausage
- 1/2 cup canned crushed tomatoes
- 1 tablespoon tomato paste
- 1 teaspoon dried oregano
- Salt and pepper to taste
- For Coating:
- 1 cup breadcrumbs
- 2 eggs beaten
- Oil for frying
Instructions
- Step-by-Step Instructions
- Step 1: Prepare the Ragu Filling
- Heat Oil: In a skillet, heat 1 tablespoon of olive oil over medium heat.
- Cook Aromatics: Add the chopped onion and garlic, sautéing until translucent (about 3-4 minutes).
- Brown Meat: Add the ground beef or sausage. Cook until browned, breaking it up with a spoon.
- Add Tomatoes: Stir in crushed tomatoes, tomato paste, oregano, salt, and pepper. Simmer for 10-15 minutes until thickened. Set aside to cool.
- Step 2: Make the Risotto
- Sauté Onions and Garlic: In a large pot, heat 2 tablespoons of olive oil over medium heat. Add the chopped onion and minced garlic; sauté until soft.
- Toast Rice: Add Arborio rice, stirring for 1-2 minutes until it’s slightly translucent.
- Add Broth Gradually: Add warm broth, one ladle at a time, stirring frequently. Allow each addition to be absorbed before adding the next, which should take about 18-20 minutes until the rice is creamy but al dente.
- Mix in Cheese and Egg: Remove from heat, stir in Parmesan cheese, and beaten egg. Season with salt and pepper. Spread the risotto on a baking sheet and let it cool for about 30 minutes.
- Step 3: Assemble the Arancini
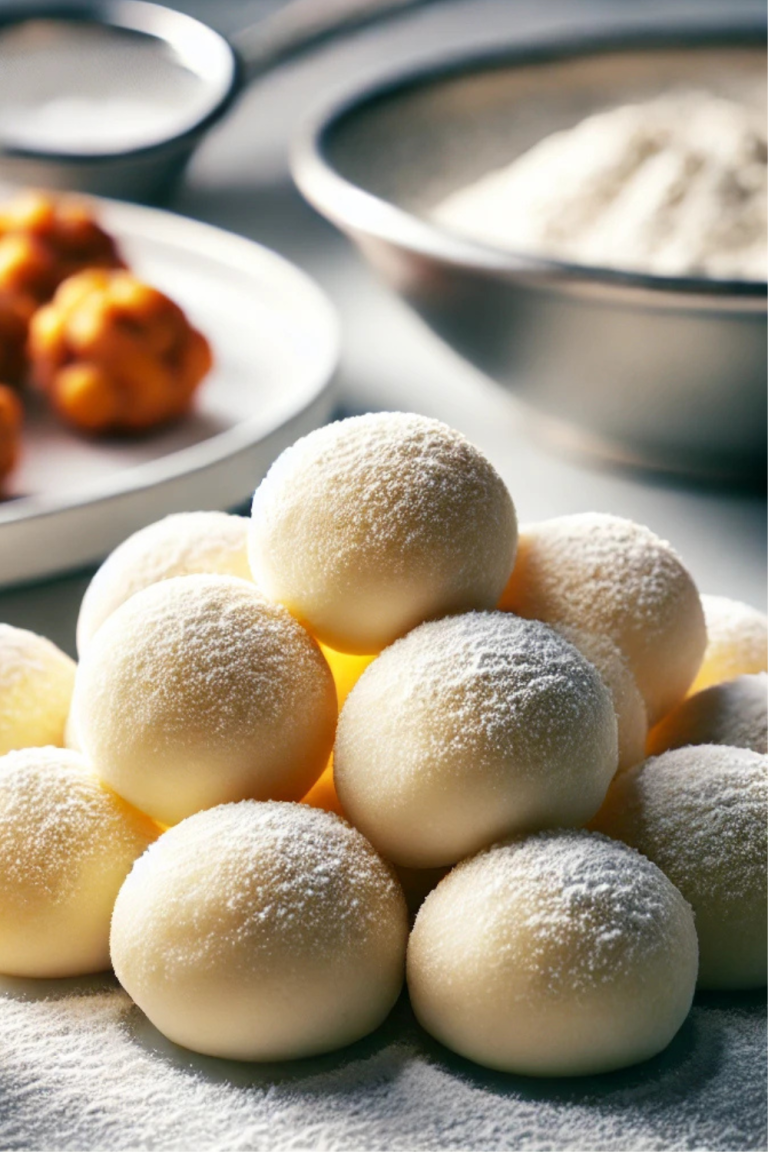
- Shape Balls: Once cooled, take a handful of risotto and flatten it in your palm. Place about 1 teaspoon of ragu filling in the center, then mold the risotto around it to form a ball. Repeat until all the risotto and filling are used.
- Prepare Coating: Set up a breading station: one dish with beaten eggs and another with breadcrumbs.
- Bread the Arancini: Dip each ball into the egg, allowing excess to drip off, then roll in breadcrumbs to coat evenly.
- Step 4: Fry the Arancini
- Heat Oil: In a deep fryer or heavy-bottomed pot, heat oil to 350°F (175°C).
- Fry Balls: Fry arancini in batches for about 3-4 minutes or until golden brown, turning occasionally. Remove with a slotted spoon and drain on paper towels.
- Variations
- Vegetarian Option: Use sautéed mushrooms or spinach in place of meat in the ragu filling.
- Cheese Stuffing: Add mozzarella cheese in the center for a gooey surprise.
- Spicy: Mix red pepper flakes into the ragu for an extra kick.

Arancini di Riso con Ragu are delicious Italian rice balls stuffed with a savory meat sauce, coated in breadcrumbs, and deep-fried to golden perfection. They are a classic Sicilian dish and a fantastic way to use leftover risotto. From my own personal experience, making arancini can seem a bit intimidating, but I assure you, with the right guidance, it’s a fun and rewarding process. Let me show you how I make these mouthwatering treats step by step.
Notes on What to Expect
When you make arancini, you can expect a delightful crunch on the outside and a creamy, flavorful interior. The combination of the crispy coating and the savory ragu filling makes them irresistible.
Recipe Overview
- Prep Time: 30 minutes
- Cook Time: 30 minutes
- Time to Stand: 30 minutes (to cool the risotto)
- Total Time: 1 hour 30 minutes
- Ease of Cooking: Intermediate
- Servings: 8 arancini
- Calories: Approximately 250 calories per serving
- Cost of Ingredients: $12 – $15 (varies by location)
- Cuisine: Italian
- Course: Appetizer or Snack
Equipment Needed
- Large pot
- Skillet
- Mixing bowl
- Baking sheet
- Large spoon or spatula
- Measuring cups and spoons
- Shallow dish for breadcrumbs
- Deep fryer or heavy-bottomed pot for frying
- Slotted spoon
- Go here to buy the must-have equipment and ingredients for making a Savory #Arancini di Riso con Ragu now.
Ingredients
For the Risotto:
- 1 cup Arborio rice
- 4 cups chicken or vegetable broth (warm)
- 1 small onion (finely chopped)
- 2 cloves garlic (minced)
- 1/2 cup grated Parmesan cheese
- 1 egg (beaten)
- Salt and pepper to taste
- 2 tablespoons olive oil
For the Ragu Filling:
- 1 tablespoon olive oil
- 1 small onion (finely chopped)
- 1 clove garlic (minced)
- 1/2 pound ground beef or Italian sausage
- 1/2 cup canned crushed tomatoes
- 1 tablespoon tomato paste
- 1 teaspoon dried oregano
- Salt and pepper to taste
For Coating:
- 1 cup breadcrumbs
- 2 eggs (beaten)
- Oil for frying
- Go here to buy the must-have equipment and ingredients for making a Savory #Arancini di Riso con Ragu now.
Step-by-Step Instructions
Step 1: Prepare the Ragu Filling
- Heat Oil: In a skillet, heat 1 tablespoon of olive oil over medium heat.
- Cook Aromatics: Add the chopped onion and garlic, sautéing until translucent (about 3-4 minutes).
- Brown Meat: Add the ground beef or sausage. Cook until browned, breaking it up with a spoon.
- Add Tomatoes: Stir in crushed tomatoes, tomato paste, oregano, salt, and pepper. Simmer for 10-15 minutes until thickened. Set aside to cool.
Step 2: Make the Risotto
- Sauté Onions and Garlic: In a large pot, heat 2 tablespoons of olive oil over medium heat. Add the chopped onion and minced garlic; sauté until soft.
- Toast Rice: Add Arborio rice, stirring for 1-2 minutes until it’s slightly translucent.
- Add Broth Gradually: Add warm broth, one ladle at a time, stirring frequently. Allow each addition to be absorbed before adding the next, which should take about 18-20 minutes until the rice is creamy but al dente.
- Mix in Cheese and Egg: Remove from heat, stir in Parmesan cheese, and beaten egg. Season with salt and pepper. Spread the risotto on a baking sheet and let it cool for about 30 minutes.
Step 3: Assemble the Arancini
- Shape Balls: Once cooled, take a handful of risotto and flatten it in your palm. Place about 1 teaspoon of ragu filling in the center, then mold the risotto around it to form a ball. Repeat until all the risotto and filling are used.
- Prepare Coating: Set up a breading station: one dish with beaten eggs and another with breadcrumbs.
- Bread the Arancini: Dip each ball into the egg, allowing excess to drip off, then roll in breadcrumbs to coat evenly.
Step 4: Fry the Arancini
- Heat Oil: In a deep fryer or heavy-bottomed pot, heat oil to 350°F (175°C).
- Fry Balls: Fry arancini in batches for about 3-4 minutes or until golden brown, turning occasionally. Remove with a slotted spoon and drain on paper towels.
Variations
- Vegetarian Option: Use sautéed mushrooms or spinach in place of meat in the ragu filling.
- Cheese Stuffing: Add mozzarella cheese in the center for a gooey surprise.
- Spicy: Mix red pepper flakes into the ragu for an extra kick.
Tips and Substitutions
- Broth Substitute: Use vegetable broth for a vegetarian version.
- Gluten-Free: Use gluten-free breadcrumbs and ensure the broth is gluten-free.
- Make Ahead: Prepare the risotto a day ahead and store it in the fridge. Assemble and fry when ready to serve.
- Go here to buy the must-have equipment and ingredients for making a Savory #Arancini di Riso con Ragu now.
Nutritional Information Per Serving
- Calories: 250
- Protein: 10g
- Carbohydrates: 30g
- Fat: 12g
- Fiber: 2g
Closing Thoughts
I hope this guide has made making Arancini di Riso con Ragu seem a little less daunting. Have you tried making them before? Please, be honest, and let me know in the comments below. I love to hear feedback from a real person like you, so please, leave your honest comment. Enjoy your cooking adventure!

Hello all,
Zio Leo here!
Cooking and sharing great food brings people together in the most authentic way, in my own personal experience, and with a lifelong passion for Italian cuisine, I’m here to share tips, recipes, and stories that celebrate the rich flavors of Italy. From classic dishes to modern twists, have my guides inspired you to bring a little bit of Italy into your kitchen? Please, be honest with me here. Leave your comments down below. I’d love to hear from real people like you. Read more about me here! =>>