Impasto del Pane Rustico (Rustic Bread Dough)
Impasto del Pane Rustico (Rustic Bread Dough)

Impasto del Pane Rustico (Rustic Bread Dough)

Impasto del Pane Rustico (Rustic Bread Dough)

Course Main Course
Cuisine Italian

Equipment

  • Equipment Needed
  • Mixing bowls, wooden spoon, measuring cups/spoons, kitchen scale (optional but recommended), parchment paper, baking sheet or Dutch oven, sharp blade or lame, wire cooling rack

Ingredients
  

  • Ingredients:
  • 500 g 4 cups bread flour
  • 350 ml 1.5 cups lukewarm water (about 37°C or 98°F)
  • 10 g 2 teaspoons salt
  • 2 g 1/2 teaspoon active dry yeast

Instructions
 

  • Method:
  • Activate the Yeast:
  • In a small bowl, combine the lukewarm water and active dry yeast. Stir gently and let it sit for about 5-10 minutes until it becomes frothy, indicating the yeast is active.
  • Combine Ingredients:
  • In a large mixing bowl, combine the bread flour and salt. Create a well in the center and pour in the yeast mixture. Using a wooden spoon or your hands, mix until a shaggy dough forms.
  • Knead the Dough:
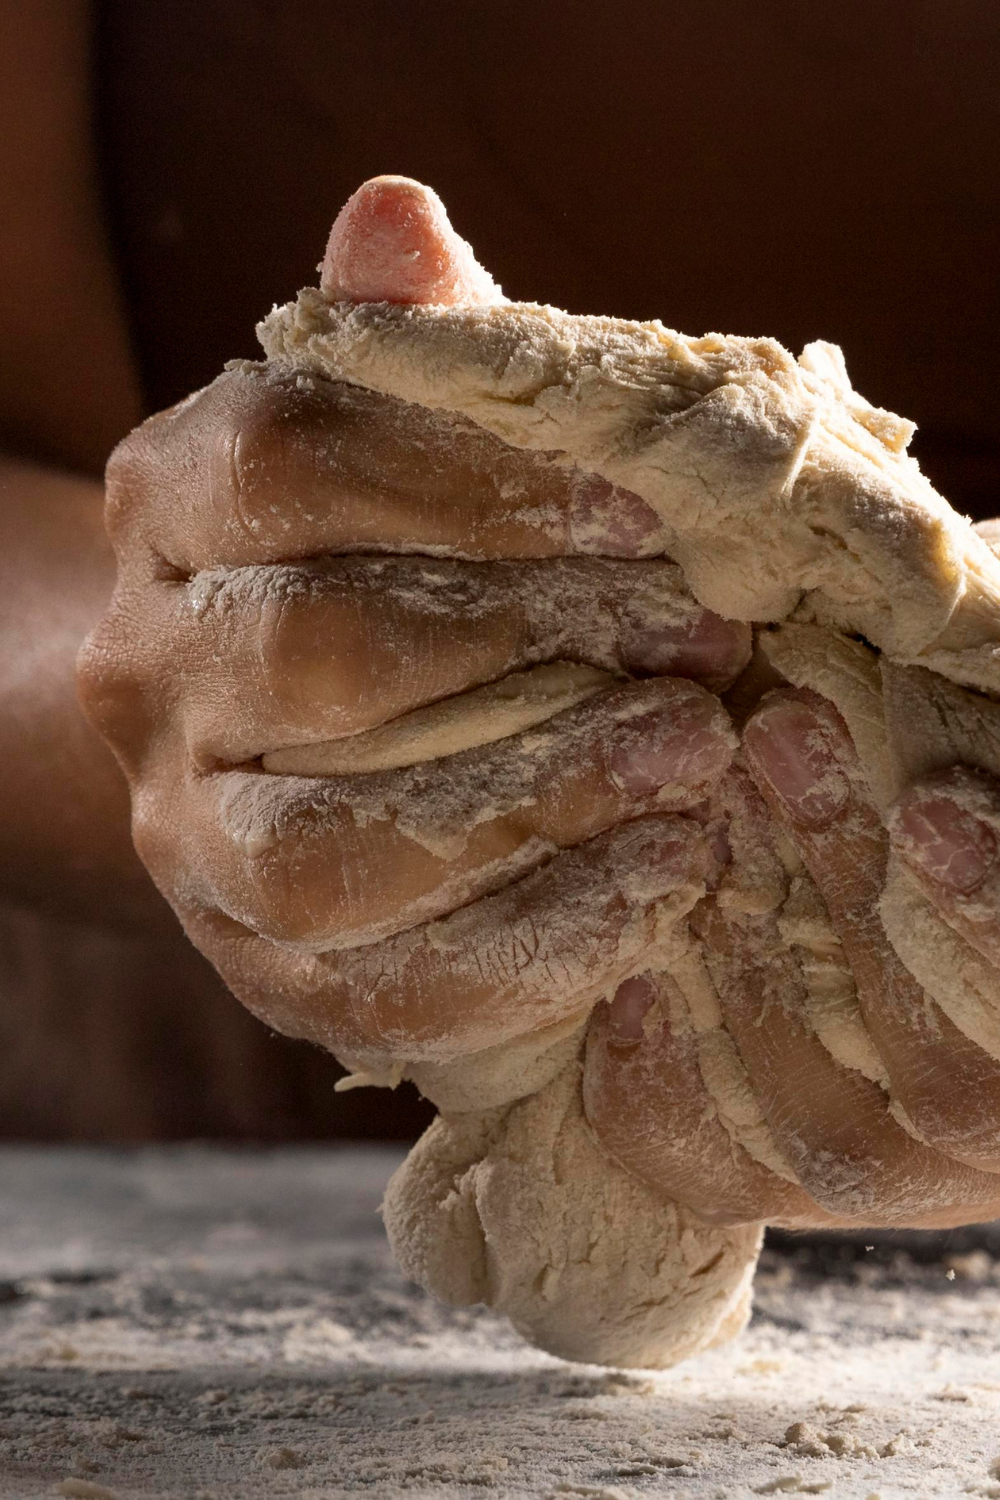
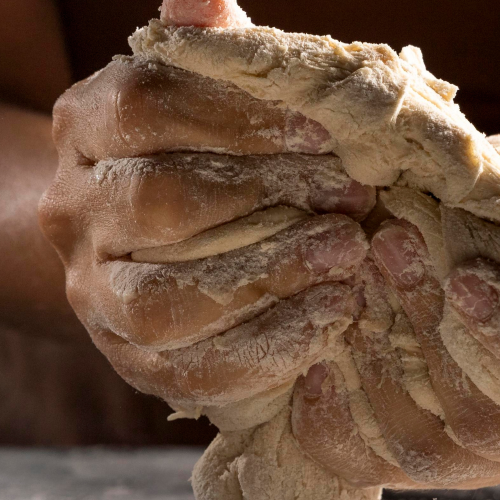
  • Transfer the dough onto a lightly floured surface. Knead for about 10 minutes until it becomes smooth and elastic. If the dough is too sticky, sprinkle a little more flour; if too dry, add a few drops of water.
  • First Rise:
  • Shape the dough into a ball and place it in a lightly oiled bowl, turning to coat all sides. Cover with a damp cloth or plastic wrap and let it rise in a warm, draft-free area for about 1 to 1.5 hours, or until doubled in size.
  • Shape the Loaf:
  • Gently punch down the risen dough to release air. Transfer it to a floured surface and shape it into a round or oval loaf, tucking the edges underneath to create surface tension.
  • Second Rise:
  • Place the shaped loaf onto a parchment-lined baking sheet or into a proofing basket seam-side up. Cover and let it rise for another 30-45 minutes until slightly puffed.
  • Preheat the Oven:
  • About 30 minutes before baking, preheat your oven to 220°C (430°F). If using a baking stone or Dutch oven, place it in the oven to heat up.
  • Score and Bake:
  • If the loaf is on a baking sheet, gently turn it onto the sheet seam-side down. Using a sharp blade or lame, score the top of the loaf with a few slashes to allow for expansion. Transfer the loaf (with parchment if using) into the preheated Dutch oven or onto the baking stone. Cover if using a Dutch oven.
  • Bake for 20 minutes, then remove the cover (if applicable) and reduce the oven temperature to 200°C (390°F). Continue baking for an additional 20-25 minutes until the crust is deep golden brown and the loaf sounds hollow when tapped on the bottom.
  • Cool:
  • Carefully remove the bread from the oven and let it cool on a wire rack for at least 1 hour before slicing. This ensures the interior sets properly.
  • Variations and Tips:
  • Whole Wheat Version: Substitute up to 50% of the bread flour with whole wheat flour for a denser, more flavorful loaf.
  • Herb-Infused Bread: Add 1-2 tablespoons of chopped fresh rosemary or thyme to the dry ingredients for an aromatic twist.
  • Olive and Sun-Dried Tomato Addition: Incorporate chopped olives or sun-dried tomatoes into the dough during the initial mixing for added texture and flavor.
  • Dietary Substitutions:
  • Gluten-Free: Use a gluten-free bread flour blend and ensure all other ingredients are certified gluten-free. Note that the texture may differ from traditional rustic bread.
  • Low-Sodium: Reduce the salt by half or use a salt substitute suitable for baking.
Keyword Impasto del Pane Rustico (Rustic Bread Dough)

Impasto del Pane Rustico, or Rustic Bread Dough, hails from various regions across Italy, each boasting its unique take on this traditional staple. This hearty bread is cherished for its crusty exterior and soft, airy interior, making it a versatile companion to numerous Italian dishes.

Impasto del Pane Rustico (Rustic Bread Dough)

Creating a successful Impasto del Pane Rustico (Rustic Bread Dough) involves attention to the key factors:

  1. Flour Selection:
    • Opt for high-quality bread flour with a protein content of around 12-14%. This ensures adequate gluten development, contributing to the bread’s structure and chewiness.
  2. Hydration Level:
    • Aim for a hydration level (water-to-flour ratio) of approximately 70-75%. This results in a slightly sticky dough, essential for achieving an open crumb and airy texture.
  3. Mixing and Autolyse:
    • Combine the flour and water first, allowing the mixture to rest for 20-30 minutes before adding yeast and salt. This autolyse period enhances gluten formation and dough extensibility.
  4. Kneading Technique:
    • Knead the dough until it becomes smooth and elastic, which typically takes about 10 minutes by hand. Proper kneading develops gluten networks that trap gases produced during fermentation, leading to better rise and texture.
  5. Fermentation Time:
    • Allow the dough to undergo a bulk fermentation until it doubles in size. This period is crucial for flavor development and can vary based on room temperature and yeast activity.
  6. Shaping:
    • Handle the dough gently to preserve the gas pockets formed during fermentation. Shape it into a tight boule or batard to promote even baking and an appealing loaf structure.
  7. Proofing:
    • Let the shaped dough proof until it has visibly expanded and passes the “poke test”, a gentle indentation should slowly spring back. Over-proofing can lead to a collapsed loaf, while under-proofing may result in insufficient rise.
  8. Scoring:
    • Use a sharp blade or lame to score the loaf just before baking. This allows controlled expansion and contributes to the bread’s aesthetic appeal.
  9. Baking with Steam:
    • Introduce steam during the initial baking phase to promote crust development. This can be achieved by placing a pan of water in the oven or using a preheated Dutch oven with a lid.
  10. Cooling:
    • Allow the bread to cool completely on a wire rack before slicing. This ensures the interior crumb sets properly and prevents a gummy texture.

By paying attention to these aspects, you’ll enhance your bread-making skills and achieve a rustic loaf with a delightful crust and flavorful crumb.

Ingredients:

Method:

  1. Activate the Yeast:
    • In a small bowl, combine the lukewarm water and active dry yeast. Stir gently and let it sit for about 5-10 minutes until it becomes frothy, indicating the yeast is active.
  2. Combine Ingredients:
    • In a large mixing bowl, combine the bread flour and salt. Create a well in the center and pour in the yeast mixture. Using a wooden spoon or your hands, mix until a shaggy dough forms.
  3. Knead the Dough:
    • Transfer the dough onto a lightly floured surface. Knead for about 10 minutes until it becomes smooth and elastic. If the dough is too sticky, sprinkle a little more flour; if too dry, add a few drops of water.
  4. First Rise:
    • Shape the dough into a ball and place it in a lightly oiled bowl, turning to coat all sides. Cover with a damp cloth or plastic wrap and let it rise in a warm, draft-free area for about 1 to 1.5 hours, or until doubled in size.
  5. Shape the Loaf:
    • Gently punch down the risen dough to release air. Transfer it to a floured surface and shape it into a round or oval loaf, tucking the edges underneath to create surface tension.
  6. Second Rise:
    • Place the shaped loaf onto a parchment-lined baking sheet or into a proofing basket seam-side up. Cover and let it rise for another 30-45 minutes until slightly puffed.
  7. Preheat the Oven:
    • About 30 minutes before baking, preheat your oven to 220°C (430°F). If using a baking stone or Dutch oven, place it in the oven to heat up.
  8. Score and Bake:
    • If the loaf is on a baking sheet, gently turn it onto the sheet seam-side down. Using a sharp blade or lame, score the top of the loaf with a few slashes to allow for expansion. Transfer the loaf (with parchment if using) into the preheated Dutch oven or onto the baking stone. Cover if using a Dutch oven.
    • Bake for 20 minutes, then remove the cover (if applicable) and reduce the oven temperature to 200°C (390°F). Continue baking for an additional 20-25 minutes until the crust is deep golden brown and the loaf sounds hollow when tapped on the bottom.
  9. Cool:
    • Carefully remove the bread from the oven and let it cool on a wire rack for at least 1 hour before slicing. This ensures the interior sets properly.

Variations and Tips:

  • Whole Wheat Version: Substitute up to 50% of the bread flour with whole wheat flour for a denser, more flavorful loaf.
  • Herb-Infused Bread: Add 1-2 tablespoons of chopped fresh rosemary or thyme to the dry ingredients for an aromatic twist.
  • Olive and Sun-Dried Tomato Addition: Incorporate chopped olives or sun-dried tomatoes into the dough during the initial mixing for added texture and flavor.

Dietary Substitutions:

Additional Information:

  • Prep Time: 20 minutes
  • Cook Time: 45 minutes
  • Rising Time: 1.5 to 2 hours
  • Total Time: Approximately 2.5 to 3 hours
  • Ease of Cooking: Beginner-friendly
  • Servings: 1 loaf (about 12 slices)
  • Calories: Approximately 150 per slice
  • Cost of Ingredients: Affordable; basic ingredients commonly found in most pantries
  • Cuisine: Italian
  • Course: Bread/Side

Equipment Needed:

Notes:

  • Dough Consistency: The dough should be slightly tacky but not overly sticky. Adjust with small amounts of flour or water as needed.
  • Steam Creation: For a crustier loaf, place a shallow pan of water on the bottom rack of the oven during the first half of baking to create steam.
  • Storage: Store the cooled bread in a paper bag at room temperature for up to 2 days. For longer storage, slice and freeze, then toast slices as needed.

Nutritional Information Per Serving (1 slice):

Nutrient Amount
Calories 150 kcal
Carbohydrates 30g
Protein 5g
Fat 0.5g
Fiber 1
Sources

Similar Posts

Leave a Reply