Classic Italian Tiramisu Recipe
Classic Italian Tiramisu Recipe

Classic Italian Tiramisu Recipe

Tiramisu

Course Dessert
Cuisine Italian

Equipment

  • Equipment Needed
  • Mixing bowls
  • Hand or stand mixer
  • Whisk
  • 9x9-inch (or similar) baking dish
  • Spatula
  • Fine mesh sieve

Ingredients
  

  • Ingredients
  • For the Cream Layer
  • 3 large eggs separated
  • ½ cup 100g granulated sugar
  • 8 oz 250g mascarpone cheese
  • 1 cup 240ml heavy cream, whipped
  • For the Coffee Layer
  • cups 360ml strong brewed espresso, cooled
  • 2 tbsp coffee liqueur optional, e.g., Kahlúa
  • For Assembly
  • 24-30 ladyfinger cookies savoiardi
  • Unsweetened cocoa powder for dusting

Instructions
 

  • Step-by-Step Instructions
  • Prepare the Egg Mixture
  • In a clean bowl, whisk the egg yolks with sugar until pale and creamy (about 3-4 minutes).
  • Fold in the mascarpone cheese gently until smooth.
  • Whip the Cream
  • In a separate bowl, whip the heavy cream until soft peaks form. Set aside.
  • Beat Egg Whites
  • Whisk the egg whites in another clean bowl until stiff peaks form.
  • Combine the Layers
  • Carefully fold the whipped cream into the mascarpone mixture.
  • Gently incorporate the beaten egg whites into the mascarpone cream, taking care not to deflate the mixture.
  • Prepare the Coffee Soak
  • Mix the brewed espresso with coffee liqueur in a shallow dish.
  • Assemble the Tiramisu
  • Dip each ladyfinger briefly into the coffee mixture (don’t oversoak). Line the bottom of your baking dish with a layer of soaked ladyfingers.
  • Spread half the mascarpone cream mixture evenly over the ladyfingers.
  • Repeat with another layer of soaked ladyfingers and the remaining mascarpone cream.
  • Chill and Serve
  • Cover and refrigerate for at least 4 hours (preferably overnight) to allow the flavors to meld.
  • Dust generously with cocoa powder before serving.
  • Variations
  • Alcohol-Free
  • Skip the liqueur; replace it with vanilla or almond extract for added flavor.
  • Gluten-Free
  • Use gluten-free ladyfinger cookies or homemade sponge cake.
  • Vegan
  • Replace mascarpone with a vegan cream cheese alternative. Substitute whipped coconut cream for heavy cream, and use plant-based ladyfingers.
  • Decaffeinated
  • Use decaf espresso to make it kid-friendly.
    Classic Italian Tiramisu Recipe
Keyword Tiramisu

Tiramisu, meaning “pick-me-up” in Italian, is a beloved dessert with layers of coffee-soaked ladyfingers, a luscious mascarpone cream, and a dusting of cocoa powder. Originating from the Veneto region, this classic treat embodies Italian indulgence. From my own personal experience, the beauty of tiramisu lies not just in its taste but also in its simplicity. Let me show you how I make this crowd-pleaser step by step, ensuring even beginners can master it.

Classic Italian Tiramisu Recipe

#Classic Italian Tiramisu #ad

Notes on What to Expect When Making Tiramisu

  1. Preparation Simplicity:
    Tiramisu is surprisingly straightforward to prepare. From my own personal experience, the most time-consuming step is assembling the layers, but it’s easy and even meditative. The key is to be gentle when folding ingredients to preserve the airy texture of the cream.
  2. Texture of the Cream:
    The mascarpone mixture should be light, fluffy, and smooth. Achieving soft peaks for the whipped cream and egg whites is crucial for this texture. If it feels too dense, it might have been overmixed.
  3. Dipping Ladyfingers:
    Be quick when soaking the ladyfingers. A brief dip (1-2 seconds) ensures they absorb just enough coffee without becoming soggy or falling apart. Expect your fingers to get a bit messy during this step.
  4. Chilling Process:
    Tiramisu requires patience, as it needs to chill for at least 4 hours. During this time, the flavors meld together, and the layers firm up slightly, making it easier to slice. Don’t rush this part, it’s worth the wait.
  5. Flavor Balance:
    The final dessert has a perfect balance of bold coffee, creamy mascarpone, and bittersweet cocoa. If you taste it right after assembly, the coffee flavor might seem strong, but it mellows beautifully during refrigeration.
  6. Visual Presentation:
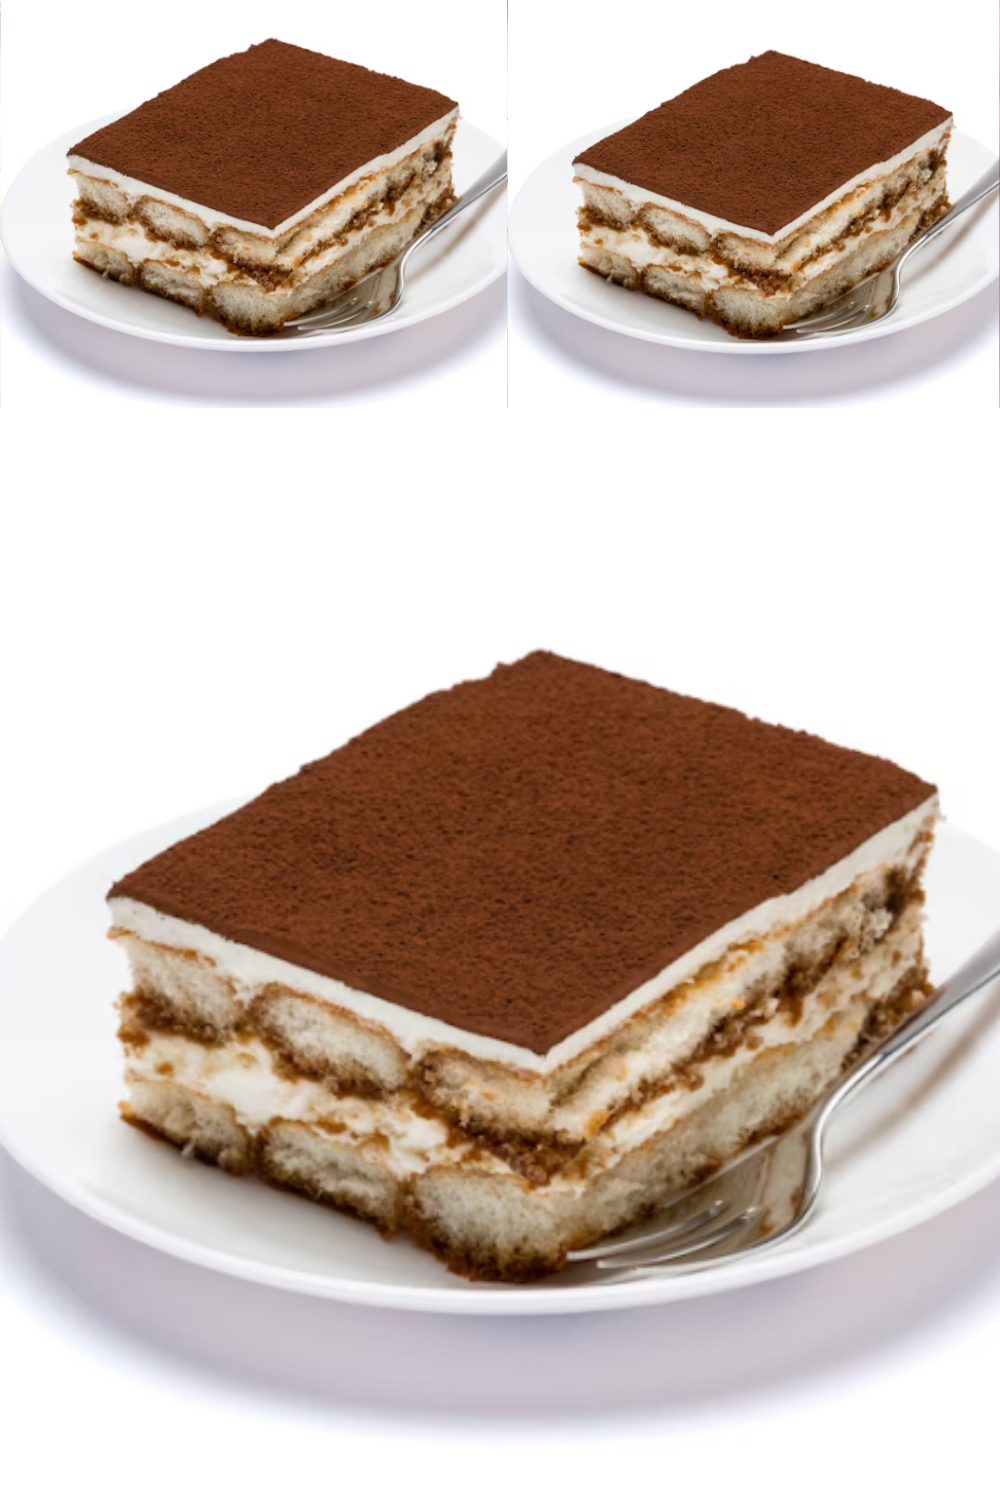
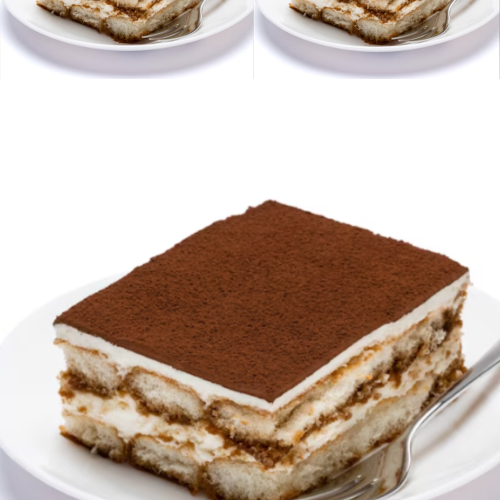
    When dusting with cocoa, expect some powder to scatter. A fine-mesh sieve helps control this and ensures an even coating. The finished tiramisu will look elegant with defined layers of ladyfingers and cream.
  7. Beginner-Friendly Process:
    While tiramisu is elegant and impressive, the steps are forgiving, making it an excellent choice for beginners. Even small mistakes, like slightly uneven layers, won’t affect the overall taste.
  8. Taste Test Bonus:
    You’ll likely have some leftover mascarpone mixture or coffee. Consider using these for a quick mini tiramisu cup to taste-test your creation before it’s fully set!

Expect a dessert that feels indulgent yet light, leaving you and your guests asking for seconds.


Recipe Overview

  • Cuisine: Italian
  • Course: Dessert
  • Prep Time: 25 minutes
  • Cook Time: N/A
  • Time to Stand: 4 hours (chilling time)
  • Total Time: 4 hours 25 minutes
  • Ease of Cooking: Beginner-friendly
  • Servings: 8
  • Calories: ~350 per serving
  • Cost of Ingredients: Moderate

Ingredients

For the Cream Layer

  • 3 large eggs, separated
  • ½ cup (100g) granulated sugar
  • 8 oz (250g) mascarpone cheese
  • 1 cup (240ml) heavy cream, whipped

For the Coffee Layer

  • 1½ cups (360ml) strong brewed espresso, cooled
  • 2 tbsp coffee liqueur (optional, e.g., Kahlúa)

For Assembly


Equipment Needed


Step-by-Step Instructions

  1. Prepare the Egg Mixture
    • In a clean bowl, whisk the egg yolks with sugar until pale and creamy (about 3-4 minutes).
    • Fold in the mascarpone cheese gently until smooth.
  2. Whip the Cream
    • In a separate bowl, whip the heavy cream until soft peaks form. Set aside.
  3. Beat Egg Whites
    • Whisk the egg whites in another clean bowl until stiff peaks form.
  4. Combine the Layers
    • Carefully fold the whipped cream into the mascarpone mixture.
    • Gently incorporate the beaten egg whites into the mascarpone cream, taking care not to deflate the mixture.
  5. Prepare the Coffee Soak
    • Mix the brewed espresso with coffee liqueur in a shallow dish.
  6. Assemble the Tiramisu
    • Dip each ladyfinger briefly into the coffee mixture (don’t oversoak). Line the bottom of your baking dish with a layer of soaked ladyfingers.
    • Spread half the mascarpone cream mixture evenly over the ladyfingers.
    • Repeat with another layer of soaked ladyfingers and the remaining mascarpone cream.
  7. Chill and Serve
    • Cover and refrigerate for at least 4 hours (preferably overnight) to allow the flavors to meld.
    • Dust generously with cocoa powder before serving.

Variations

  1. Alcohol-Free
    • Skip the liqueur; replace it with vanilla or almond extract for added flavor.
  2. Gluten-Free
    • Use gluten-free ladyfinger cookies or homemade sponge cake.
  3. Vegan
    • Replace mascarpone with a vegan cream cheese alternative. Substitute whipped coconut cream for heavy cream, and use plant-based ladyfingers.
  4. Decaffeinated
    • Use decaf espresso to make it kid-friendly.

Tips for Success


Nutritional Information Per Serving

  • Calories: 350
  • Protein: 6g
  • Carbohydrates: 28g
  • Fat: 22g
  • Sugar: 16g

Notes on What to Expect

Your tiramisu should have distinct layers with a creamy, melt-in-your-mouth texture. The coffee and mascarpone flavors should balance perfectly, complemented by the slight bitterness of the cocoa dusting.


Closing

I hope this guide has made making tiramisu seem a little less daunting. Have you tried it before, or are you planning to give it a go now? Please, be honest, and let me know in the comments below. I love hearing feedback from a real person like you, so please, leave your honest comment.

Similar Posts

Leave a Reply